
OK I know i was trying to keep this blog pretty up to date and it seems to have been fits and starts, well that's more because it "Has" been fits and starts with the build.
New toy section this month sees the addition of a boxford TUD lathe to the workshop, an amazing little tool that is proving useful for everything other than getting on with the build.
I have however to the report that the Dremel I brought is MIA presumed killed, Aka I burnt it out. so I'm looking to get that repaired ATM.
As for the car well I haven't really done alot since the last update, the Cossie Discs and calipers have been refitted along with the 15 inch wheels, the 17's are going back on eBay there just too big.
I have also decided to replace the dash, so instead of the sierra clocks I will be using an AceWell Digital Dash, the 7659 In fact I collected it today and its adorable :P~
To days efforts have centered around completing the rear brake lines, and wiring, all of which is now done even with the fuel sender fitted and earthed! Pictures to follow tomorrow.
Tomorrows Plan is to continue with the wiring, starting off with the fitting of the Speed sensor for the new dash, my plan is to drill and tap the Lobro on the rear drive shaft before loctiting the magnet in and mounting the sensor on a bracket attached to the rear upright. sounds easy eh.
After this the wiring will have to be run up the tranny tunnel, along with the wiring for the reverse sensor.
once these are done I will endeavour to mount the actual dash and wire it up, followed by the Fog light switch before reinstalling the steering column and column switch gear.
this isn't as easy as it sounds as the loom has been made for the standard sierra clocks and requires a fairly extensive modification to the dash area wiring to suit the new dash however i believe it is a modification well worth the effort.
who knows I might just get all that done.
Monday, 23 May 2011

Friday, 4 March 2011
The longer you leave things the harder it gets....... like cheese.
Ok so first off appologies for the lack of a blog for that last month(ish) I know some of you will have been tearing your hair out in anticipation of this update thinking wow its been a month we must see some huge changes to the build, no not huge monsterous!

And the fact is i dont even have a clever excuse for my absence its been sheer laziness on my part.
More bodywork! The nost cone and scuttle are mounted!

well no and you can blame some of it on joining a gym (ok stop laughin, no seriously get off the floor and wipe your face!) and some of it on these two urcins in the pic below, (daddy can we sit in the car!!)
And the fact is i dont even have a clever excuse for my absence its been sheer laziness on my part.
So there.
Big news to start, I have finally replaced my ailing welder witha 185A Draper jobbie thats the mutts danglers! so no more kicking the siegen unit around the workshop because the wire feed is playing up. Ive also begger dad to get hold of some bags of sillica for me, uknow the stuff u get in little bags that says "Do not eat" etc etc on it well thats a dessica (drying) agent and im going to pop a couple of Ilbs of it into my welder to keep it tickety boo.
Other big news, compressor is playing up, i think there is water in the reciver but havent had to time to take it out and drain it.
Ok so onto the car!
since the last time we spoke I have become the proud (eh??) owner of a set of 4 pot wilwood brakes to go up front, these should make it stop nice :) Ive also got it back on all 4 wheels with the rear brakes fitted.
I have run the wiring down the transmission tunnel and stated to split it into its sperate conduits for the 4/5 rear applications.
The wiring in the engine bay is 95% Complete and in conduit and looking snazzy.
I now have all the fittings needed for the cooling system and will be proceeding with that post haste.
AND !!!! The side panels are fitted! Yay I hear you cry aloud, however i still need to trim up the areas around the wishbones and steering arms before fitting trim to it, i didnt take into account the space for the actuall rubber trim so everything fouls.
The Rear brakes a done, well almost i construted supports for it to carry it over the diff and down the car before running up to the bracketry for the rear flexis but havent finished the n/s yet.
More bodywork! The nost cone and scuttle are mounted!
You know what just enjoy The picture and I will endevour to keep this blog up to date.
Saturday, 29 January 2011
A mistake is just another way of doing things!
Okay so its been 10 days since my last update.
I have however been busy, you will of course remember my stint on ebay, the silicone hose i ordered was good quality and fitted nicely and the "meter" i ordered of each was generous.
I need to make some brackets and get some bigger p clips for the 8mm ID silicone hose.
I didnt order everything i needed so another stint was required and has been done, im waiting for the last of it to arrive, then i can figure out how to get the bottom rad hose past the fan belt!
moving to the back of the car i started to fit the uprights, and discovered that i had fitted them on the wrong side after a posting on the haynes forum big love to Ronnie for noticing it.
So onwards with fitting the uprights, ermmm nope the RU7 and RU8 plates are 180 degrees out.
so now waiting for replacements from saturn. due next week.
Ive also fitted the trigger wheel and hall effect sensor for the mega jolt and downloaded the software and now big love to AshG for posting me the lead so i can plug in to it.
lots of love floating about this post.
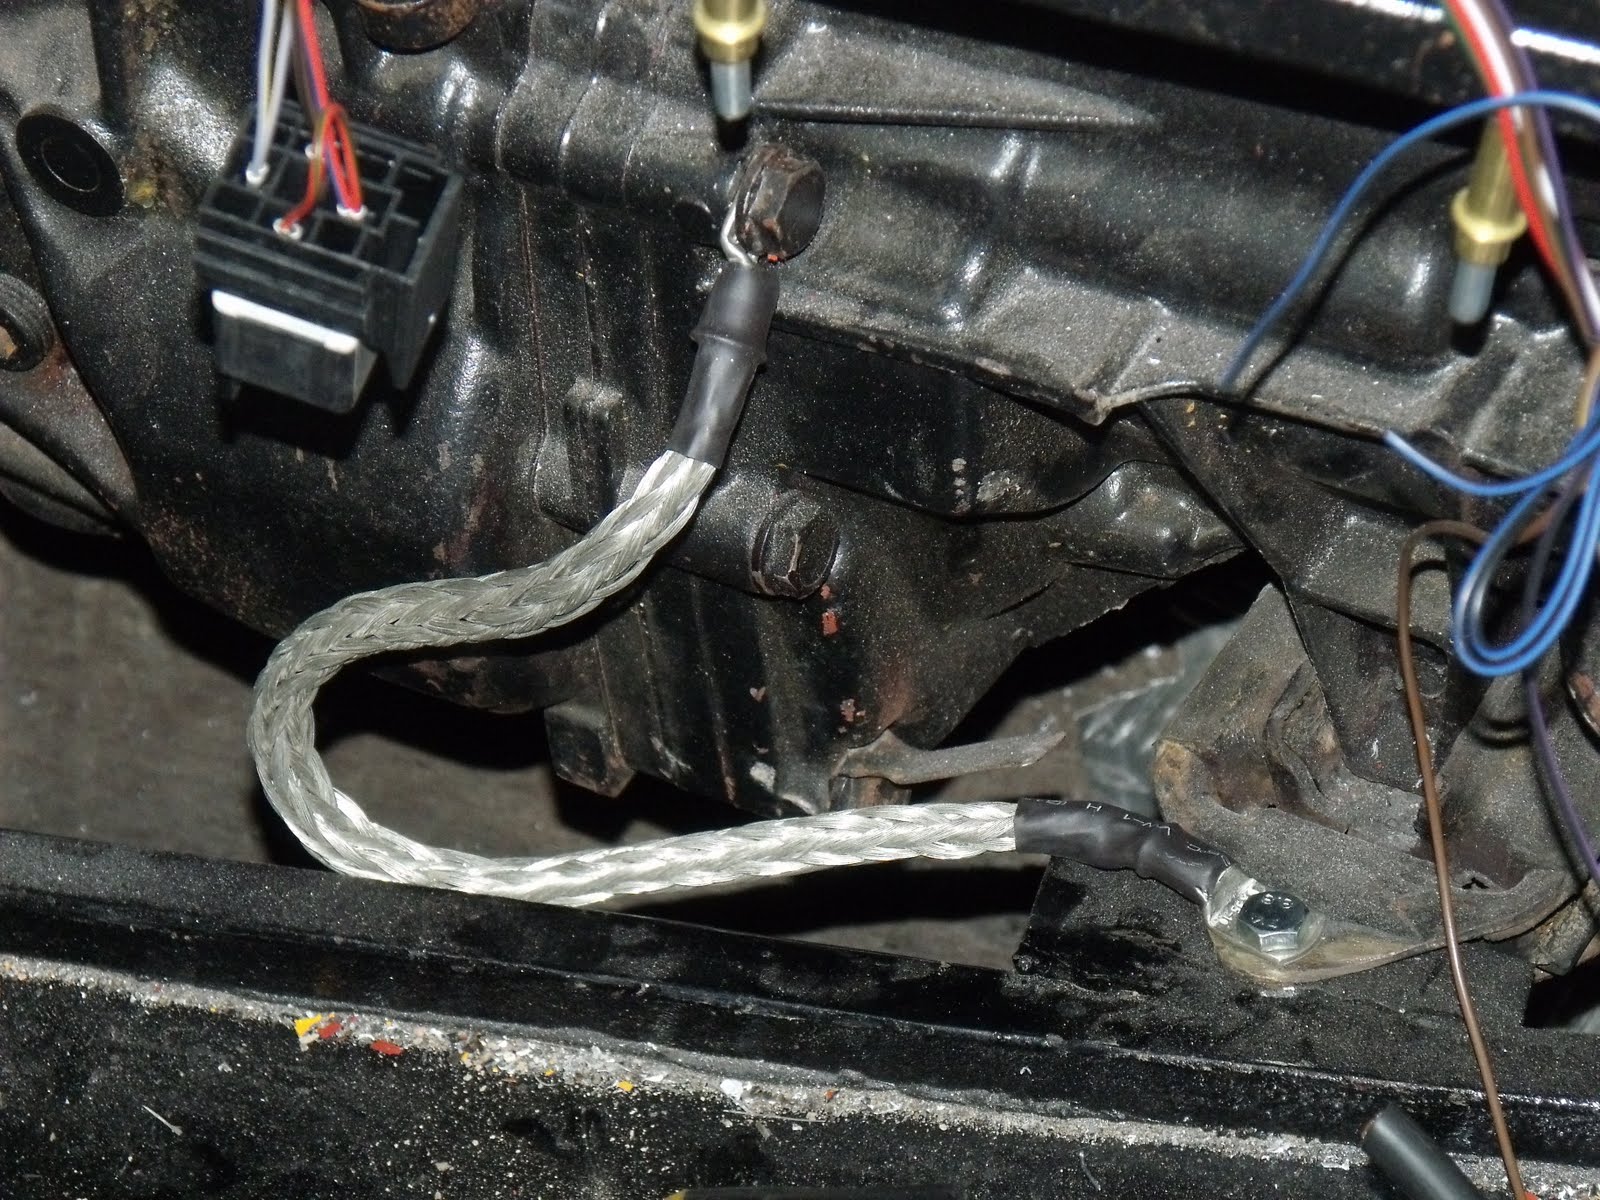
after a little work the earth bond is fitted between the gearbox and chassis.
White dial kit is fitted to the speedo head and the ali is cut for the seat back panel.
wiring is run down the transmission tunnel and p clipped. now to get to screwfix for some m6 self drilling/tapping screw and cable tie bases
enjoy the new pics.


I have however been busy, you will of course remember my stint on ebay, the silicone hose i ordered was good quality and fitted nicely and the "meter" i ordered of each was generous.
I need to make some brackets and get some bigger p clips for the 8mm ID silicone hose.
I didnt order everything i needed so another stint was required and has been done, im waiting for the last of it to arrive, then i can figure out how to get the bottom rad hose past the fan belt!
moving to the back of the car i started to fit the uprights, and discovered that i had fitted them on the wrong side after a posting on the haynes forum big love to Ronnie for noticing it.
So onwards with fitting the uprights, ermmm nope the RU7 and RU8 plates are 180 degrees out.
so now waiting for replacements from saturn. due next week.
Ive also fitted the trigger wheel and hall effect sensor for the mega jolt and downloaded the software and now big love to AshG for posting me the lead so i can plug in to it.
lots of love floating about this post.
after a little work the earth bond is fitted between the gearbox and chassis.
White dial kit is fitted to the speedo head and the ali is cut for the seat back panel.
wiring is run down the transmission tunnel and p clipped. now to get to screwfix for some m6 self drilling/tapping screw and cable tie bases
enjoy the new pics.


Wednesday, 19 January 2011
Yeah Well You Can Argue Anything With Facts Mate.......
Ok so some more work done since the last time
But not alot.
Removed the trigger wheel from the spacer drill out the broken dowel and refit ready for fitting to the pinto.
A little research with the guys from Locostbuilders confirms that 3 point harnesses are out, however a short conversation with Matt at CBS has arranged to return the 3 points and replace them with 4 points.
Grand fellas.
Ive managed to source a new liner for the welder and it was feeding better until i decided to tap the wire feed bearing with a screw driver, which killed it. so I now need to order a new one.
Fandabbydosey.
7/16 UNF seat belt bolts sourced. to be ordered Friday.
a brief stint on eBay has sourced a fuel filler for £45 and a cheap supplier of Silicon hoses. just need to figure out the ones I need.
Until next time...
But not alot.
Removed the trigger wheel from the spacer drill out the broken dowel and refit ready for fitting to the pinto.
A little research with the guys from Locostbuilders confirms that 3 point harnesses are out, however a short conversation with Matt at CBS has arranged to return the 3 points and replace them with 4 points.
Grand fellas.
Ive managed to source a new liner for the welder and it was feeding better until i decided to tap the wire feed bearing with a screw driver, which killed it. so I now need to order a new one.
Fandabbydosey.
7/16 UNF seat belt bolts sourced. to be ordered Friday.
a brief stint on eBay has sourced a fuel filler for £45 and a cheap supplier of Silicon hoses. just need to figure out the ones I need.
Until next time...
Tuesday, 18 January 2011
Slowly Slowly Catchy Monkey
Not much progress last weekend, well none in fact.
Work was manic so the roadster had to take a back burner but Im not on call this week so its full steam ahead.
Only an hour last night but a productive one I feel, I fitted the rubber/foam cushion from CBS to the edges of the nosecone and scuttle, I wasnt impressed with the adhesive on it so i used some spray glue to augment it, then clamped it in place for 10 mins for so to allow it to cure.
This Done I proceeded to trim and fit the bonnet and finalise the nose cone and scuttle mountings which now have nice m6 Rivnuts in them, I am however slightly concerned that the holes in the scuttle are a little close to the inner edge but I will take a look at this tonight when i removed the scuttle to trim some aluminum for the dash panel.
Until Next Time Viewers
Stay Vigilant.
Work was manic so the roadster had to take a back burner but Im not on call this week so its full steam ahead.
Only an hour last night but a productive one I feel, I fitted the rubber/foam cushion from CBS to the edges of the nosecone and scuttle, I wasnt impressed with the adhesive on it so i used some spray glue to augment it, then clamped it in place for 10 mins for so to allow it to cure.
This Done I proceeded to trim and fit the bonnet and finalise the nose cone and scuttle mountings which now have nice m6 Rivnuts in them, I am however slightly concerned that the holes in the scuttle are a little close to the inner edge but I will take a look at this tonight when i removed the scuttle to trim some aluminum for the dash panel.
Until Next Time Viewers
Stay Vigilant.
Friday, 14 January 2011
Happy New Year - What do you mean its the 14th!
Sorry for the delay in an update I'm sure lots of you were sitting with baited breath waiting for my words.
So whats occured, I have broken the wire speed control on my welder, tried to be a clever sod and solder a new speed pot to it only to discover it didn't help, £69 later and a new PCB is sitting in my kitchen waiting to be fitted (only arrived yesterday)
My parts from 3GE have arrived for my top harness mounts and in preparation to fit them i discovered that my 3 point harness may no longer be IVA safe! so were watching this space atm to see if another £100 needs spending on harnesses or if I can sweet talk CBS into allowing me to return them.
what else, hmmmm Ive fitted the 40 Dcoe webbers and discovered to avoid cutting the bonnet I will indeed need t fit some trumpets as opposed the the currently fitted filters.
Oh and as per usual fitting them was no straight forward job either as a part of the linkage was too short for the manifold and had to be replaced at the great cost of £12, thanks to Steve at Northampton motor sport for sourcing that 'orrible little part for me.
Due to a nice little cheque from the IRS I have placed an order with SSC for my cycle wing stays and interior aluminum panels.
Ive spend £42 on rubber edging trim from the bonnet, cycle wings, and panel holes from CBS, good quality stuff too and super fast delivery.
and a sheet of 2mx1mx1.5mm alu has been ordered for the rear panel, this should arrive next Friday with any luck.
another £12 went on a coolant switch for the rad fan. these little bits really do add up.
New rear up rights have arrived and been duly painted, but i think I may have damaged a CV joint so more on that next update,
Plans for this weekend are as follows:
Repair welder, tackweld M8 washers every 80mm down the transmission tunnel for the wiring loom to be secured to.
paint said washers, finalise position of scuttle by fitting rubber trim to nose and scuttle then temp fitting bonnet. secure scuttle with 4 rivnuts.
remove damaged driveshaft and inspect.
make up brake pipe for rear
fit from brakes
fit rear brakes
however the reality of it is that I'm on call this weekend so I doubt more than 1 or two small jobs will be completed.
So whats occured, I have broken the wire speed control on my welder, tried to be a clever sod and solder a new speed pot to it only to discover it didn't help, £69 later and a new PCB is sitting in my kitchen waiting to be fitted (only arrived yesterday)
My parts from 3GE have arrived for my top harness mounts and in preparation to fit them i discovered that my 3 point harness may no longer be IVA safe! so were watching this space atm to see if another £100 needs spending on harnesses or if I can sweet talk CBS into allowing me to return them.
what else, hmmmm Ive fitted the 40 Dcoe webbers and discovered to avoid cutting the bonnet I will indeed need t fit some trumpets as opposed the the currently fitted filters.
Oh and as per usual fitting them was no straight forward job either as a part of the linkage was too short for the manifold and had to be replaced at the great cost of £12, thanks to Steve at Northampton motor sport for sourcing that 'orrible little part for me.
Due to a nice little cheque from the IRS I have placed an order with SSC for my cycle wing stays and interior aluminum panels.
Ive spend £42 on rubber edging trim from the bonnet, cycle wings, and panel holes from CBS, good quality stuff too and super fast delivery.
and a sheet of 2mx1mx1.5mm alu has been ordered for the rear panel, this should arrive next Friday with any luck.
another £12 went on a coolant switch for the rad fan. these little bits really do add up.
New rear up rights have arrived and been duly painted, but i think I may have damaged a CV joint so more on that next update,
Plans for this weekend are as follows:
Repair welder, tackweld M8 washers every 80mm down the transmission tunnel for the wiring loom to be secured to.
paint said washers, finalise position of scuttle by fitting rubber trim to nose and scuttle then temp fitting bonnet. secure scuttle with 4 rivnuts.
remove damaged driveshaft and inspect.
make up brake pipe for rear
fit from brakes
fit rear brakes
however the reality of it is that I'm on call this weekend so I doubt more than 1 or two small jobs will be completed.
Thursday, 23 December 2010
Tempus Fugit..........
Ok So I know the literal translation is time flees but stop being so picky!


I know its also been a week since my last update, I've been busy so I think you will forgive me.
On my last update I had just a bare chassis with front suspension in situ.
Since then I have undertaken the following,
Permently Rivet fuel line and brake lines.
Fit Steering Colum bearing.
Fit Steering Colum and extension shaft.
Fit Steering Rack.
Fit Engine

Fit Gear Box
Fit Prop
Fit Differntial.
Fit rear suspension and wishbones but not uprights as these have gone back to Saturn for modification.
Fit Radiator
Fit Headlamps
Trial fit scuttle and bulkhead with nose cone and bonnet, doing so I discovered that my poistion for the scuttle was to far rearwards and needed bringing forward otherwise my bonnet will be too short!

Brrrrrrrmmmmmmmm bbbbbbbbrrrrrrrrrrmmmmmmmmmm bbbbbbrrrrrrrrmmmmmm
Thursday, 16 December 2010
What a difference a day (or five) makes......
Ok so its been five days since my last update, as well pretty much nothing has happened.
Well that's no entirely true,
The Diff has been painted and ratio identified as a 3.92.
The driveshafts have been reconditioned with new grease and new boots utilising steel boot clamps as opposed to cable ties.
The rear hubs have been painted and reconditioned with new bearings races and seal then treated to a coat of paint.

So tonight there was no reason to procrastinate any longer, a small tidy up of the workshop and in went the diff.

Following this I then refitted the fuel tank and started to site the facet pump deciding on using the diagonal brace for the tank support, two rivnuts and a couple of stainless M6 button heads later.

Of course this allows me to get a nice smooth bend on my fuel hose, I'm thinking of replacing the rubber bend with a copper one but i want to get some feedback from the lads on the haynes forum before I do.

Next was getting the fuel line up to the top of the diff i think the pictures show the route Ive taken well enough.
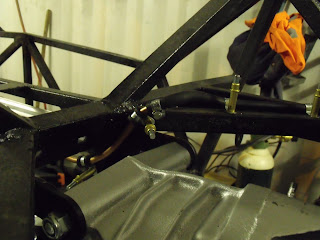
Being unsure of the IVA requirement for security of fuel and brake lines Ive secured them every 180MM using rubber lined stainless P clips and plan to use the same holes to run the brake line parallel in the same fashion.

Saturday, 11 December 2010
Minor Update
So Saturday has been quiet so far, the sproglets and I took a jaunt down to see Alan at Premier wiring to collect my wiring loom. Not only did we come away with a top notch wiring loom we also purchased battery cables earth bond cable and rear fog and reverse lamps.
Once we got home i fired up the compressor and shot blasted the rear bearing carriers before giving them a couple of coats of primer. I'll let that set and then give them a couple of coats of top coat ready for the new bearings next week.
Ive also bent over one end of the Ali strip I'm going to be running down the transmission tunnel and into the engine bay and clamped it in place ready to start running the fuel and brake like down. I'm planning to do the same on the other side for the wiring loom.
Lets hope tomorrow brings a quiet day I want to have a tidy up again and move the parts racking into the other lock up and try to get the workbench to fit over the compressor to give me a worktop.
Once we got home i fired up the compressor and shot blasted the rear bearing carriers before giving them a couple of coats of primer. I'll let that set and then give them a couple of coats of top coat ready for the new bearings next week.
Ive also bent over one end of the Ali strip I'm going to be running down the transmission tunnel and into the engine bay and clamped it in place ready to start running the fuel and brake like down. I'm planning to do the same on the other side for the wiring loom.
Lets hope tomorrow brings a quiet day I want to have a tidy up again and move the parts racking into the other lock up and try to get the workbench to fit over the compressor to give me a worktop.
Friday, 10 December 2010
Strapping.....
So thats both fuel tank straps completed, internal edges lined with foam backed tape, chassis lined with rubber, rear tank straps mounted via rivets to the chassis and the other sides secured via the riv nuts mentioned in the last post.

I then started to removed the remaining driveshaft from the rear diff, only to break another couple of TX40 bits, time to buy a propane torch and get some heat on them, as I want to get the diff mounted so I can run the fuel line and mount the pump.
today was semi productive on the kit car front, I got a gas bottle for the welder finally and collected a lightened flywheel to let the pinto rev easier.
Im hoping that the weekend will be quiet so that I can get the shot blasting done on the rear hubs ready to take them to a mates monday to get the new bearing races pressed in. and if i can get the drive shafts off new cv boots too!
Thursday, 9 December 2010
Burn Baby Burn Garage Inferno.......
Ok So I've had a bit of luck for a change! I managed to pick up a non working large diesel space heater.
Got it home, repaired a broken wire, cleaned the shite out of the tank and cleaned the filter and ignition plug, unblocked the injector nozzle put it all back together an voila - a working heater for the workshop and for next to nothing!

So with this in place and a little help from a mate to lift the chassis back onto the tressells before carrying on to grind the welds clean and give them a nice coat of paint.
I then decided to work back forwards with regardst to getting the fuel system sorted, Ive glued rubber matting to the chassis where the tank sits to stop it rubbing.

Then I drilled and inserted 2 Rivnuts into the back of the chassis to hold the tank straps, im planning to rivet the back of them to the chassis.
whilst I was doing this my mate was helping out by reinstalling the pedal box and master cylinder along with the front brake lines (secured with clecos for now) I did notice that I need to cut a small "slot" into the clutch pedal to allow for fitment of the clutch cable without removing the soldered nipple.

Sunday, 5 December 2010
Itchy & Scratchy!
Ok I know its been a month since I last wrote a blog entry a fair bit has happened which I will now endeavour to bring you up to date with.

I did managed to get the chassis painted as planned and it looked gorgeous! then I decided that I would start a trial fitting of the GRP.

Good plan, I discovered that the rear semi-circular plates needed to be removed.
Enter me with plasma cutter and 20 minutes later there off. From here things get a little awkward.
I start to weld up the various little nicks in the chassis where I cut the plates from and run out of
gas, not a major issue except i need to get a "proper" bottle to replace my helium bottle. this is still not done.
So I ended up borrowing my land lords welder, welding up what I needed to.

After fitting the rear end I decided to tackle the side panels, not to much of a task but one requiring me to constantly badger Andy @ Saturn sports cars, Thanks Andy!
So as I sit now the pair of side panels and the rear tub have been mock fitted along with the nose cone complete with radiator in situ. they have all been removed now for final "fettling" rounding off the corners etc.

the rear tub will of course require more mods including the holes for the suspension to come thru but i plan to do this when i finally fit it as i dont really want the weakened panel sitting about.
A little road trip this weekend took me down to see AshG and purchase a Megajolt from him. nice guy.
Then over to see Alan at premier wiring systems and placed an order for a full wiring loom.
A couple of peeks onto eBay has seen me the owner of a new set of alloys that clear my front brakes! and a set of caterham rear lights.

Enjoy the piccies.
Monday, 1 November 2010
Metal splinters and Welding burns....
Been a while since the last update, I've had a few ups and down with the car over the last two weeks.
- The weld nuts arrived and were duly welded to the harness mounts.
- The head lamp brackets were welded on and then the dreaded re design of the rear roll bar braces.
Take a look at the two pics to see the difference, Original "Book" on left redesign on Right


just need to knock the rear suspension back on and plan the positions of the rear brake flexi pipe mounts and the fuel pump and regulator brakets before clearing out the workshop and sheeting it up ready for painting next weekend.
Monday, 18 October 2010
"Insert clever sentence here"
So a little progress, I got the chassis stripped back down, I finished welding the rear frame work and the engine / gearbox mounts (Finally) I even cut a couple of pieces of steel and welded end plates on the open box section.
Then I welded the seat brackets in! Ya Finally!
I did however notice that i need to recon the rear uprights, having stripped one and shot blasted it i just need to pop it in my mates hot water parts washer to ensure all the grease is removed so no shot is hiding anywhere! but i think i will finish stripping the other one first !
Ive painted the new rear up rights in primer and primed and given the first top coat to the engine mounts.
Now I just need to figure out what I'm doing for the modifications to the rear stays on the roll bar and get the bosses for the harness welded in and also need to get some "Weld nuts" so I can weld the harness mounts in.
so some progress but not a lot!
Then I welded the seat brackets in! Ya Finally!
I did however notice that i need to recon the rear uprights, having stripped one and shot blasted it i just need to pop it in my mates hot water parts washer to ensure all the grease is removed so no shot is hiding anywhere! but i think i will finish stripping the other one first !
Ive painted the new rear up rights in primer and primed and given the first top coat to the engine mounts.
Now I just need to figure out what I'm doing for the modifications to the rear stays on the roll bar and get the bosses for the harness welded in and also need to get some "Weld nuts" so I can weld the harness mounts in.
so some progress but not a lot!
Wednesday, 13 October 2010
Absence lends fondness to the heart, and distance lends enchantment to the eye!
So after a whole month of virtual inactivity on the roadster were off again!
Well some of it wasn't my fault as you the intrepid reader will no doubt recall I was whisked away on a big metal bird to somewhere hot sunny and with cheap beer for two weeks! then back to the real world of work and responsibility so the car had to stay as she was for another two weeks.
However last night I managed to work up not only time but enthusiasm to work on her! I finished the welding I had started and dropped the chassis back on its wheels to carry on with the welding of the mounts.
Rather than tip it up on the other side and allow diff oil to run from the breather I decided that I will do that last bit of welding on that side of the chassis when I remove the Diff again (later this week hopefully) as I have decided to replace the CV boots and paint the drive shafts as they look a little rough.
I did however carry on with the seat mounts, I now have one set ready to weld in on the drivers side, I just need to wire brush some paint off the chassis to ensure a good weld and away I go with that! I am however still in 2 minds about the passenger seat as it has no adjustment runner, I'm unsure if I should fit one or not.
On a lighter note my headlights have arrived from Rally design, A mate of mine had ordered a plumbed in fire extinguisher for his 4X4 "Tonka" toy from them so I just tagged my order on with his and we split the P&P to save a couple of quid each.
Oh and thanks again to the guys @ Saturn Sports Cars I received my replacement rear uprights today Spot on thanks Guys!
After reading through the Haynes forum I came across a good idea one of the lads had concocted of using nail varnish to mark a finished nut/bolt combination, so a visible check is fast and fastidious, I loved the idea as the tippex Ive always used can be hard to see so Ive got some "Slut Red" nail varnish as my mate calls it, should be nice and see able.
So plenty of parts to fit and not a lot of time to do it, I'm sat at home feeling like shite at the moment with a chest infection so I cant really go and spend a cold day in the workshop if i felt well enough to do that Id be at work!
Lets hope I feel better tomorrow so I can crack on again.
Well some of it wasn't my fault as you the intrepid reader will no doubt recall I was whisked away on a big metal bird to somewhere hot sunny and with cheap beer for two weeks! then back to the real world of work and responsibility so the car had to stay as she was for another two weeks.
However last night I managed to work up not only time but enthusiasm to work on her! I finished the welding I had started and dropped the chassis back on its wheels to carry on with the welding of the mounts.
Rather than tip it up on the other side and allow diff oil to run from the breather I decided that I will do that last bit of welding on that side of the chassis when I remove the Diff again (later this week hopefully) as I have decided to replace the CV boots and paint the drive shafts as they look a little rough.
I did however carry on with the seat mounts, I now have one set ready to weld in on the drivers side, I just need to wire brush some paint off the chassis to ensure a good weld and away I go with that! I am however still in 2 minds about the passenger seat as it has no adjustment runner, I'm unsure if I should fit one or not.
On a lighter note my headlights have arrived from Rally design, A mate of mine had ordered a plumbed in fire extinguisher for his 4X4 "Tonka" toy from them so I just tagged my order on with his and we split the P&P to save a couple of quid each.
Oh and thanks again to the guys @ Saturn Sports Cars I received my replacement rear uprights today Spot on thanks Guys!
After reading through the Haynes forum I came across a good idea one of the lads had concocted of using nail varnish to mark a finished nut/bolt combination, so a visible check is fast and fastidious, I loved the idea as the tippex Ive always used can be hard to see so Ive got some "Slut Red" nail varnish as my mate calls it, should be nice and see able.
So plenty of parts to fit and not a lot of time to do it, I'm sat at home feeling like shite at the moment with a chest infection so I cant really go and spend a cold day in the workshop if i felt well enough to do that Id be at work!
Lets hope I feel better tomorrow so I can crack on again.
Monday, 13 September 2010
So fantasy gives way to reality.
Monday again, nothing done all weekend on the car due to the kids the weather and feeling like death warmed only ever so slightly.
So back to work today and a shock to the system that was! up at 03:30 and down to work on a refinery for the best part of the day, hot sticky uncomfortable work.
even so the day ended at a reasonable time and I even managed to get home at a reasonable time.
Planning to get on with the kit this evening was fruitless, first off the Mondeo had a flat tyre and a dent in the wheel rim, im hoping that the flat tyre was down to the dent in the rim seeping air.
so after a gentle realignment using the magic stick (IE copper mallet and drift) i pumped the tyre up and tomorrow will tell.
whilst moving the car i noticed the rear brakes didnt sound to good, so more inspection and eh voila rear brakes are worn out.
luckily being a clever cat I was prepared for this having brought new rear discs and pads when i replaced the fronts a month or so ago (ok im lazy not fitting them all at once)
so tonights kit time went on the mondeo, after all I cant have it breaking down on the way to gatwick airport friday!
cant wait to get on that big metal bird and fly off to the sun for 2 weeks!
So back to work today and a shock to the system that was! up at 03:30 and down to work on a refinery for the best part of the day, hot sticky uncomfortable work.
even so the day ended at a reasonable time and I even managed to get home at a reasonable time.
Planning to get on with the kit this evening was fruitless, first off the Mondeo had a flat tyre and a dent in the wheel rim, im hoping that the flat tyre was down to the dent in the rim seeping air.
so after a gentle realignment using the magic stick (IE copper mallet and drift) i pumped the tyre up and tomorrow will tell.
whilst moving the car i noticed the rear brakes didnt sound to good, so more inspection and eh voila rear brakes are worn out.
luckily being a clever cat I was prepared for this having brought new rear discs and pads when i replaced the fronts a month or so ago (ok im lazy not fitting them all at once)
so tonights kit time went on the mondeo, after all I cant have it breaking down on the way to gatwick airport friday!
cant wait to get on that big metal bird and fly off to the sun for 2 weeks!
Friday, 10 September 2010
So on the seventh day......... bugger its only friday - CUT
So today has been a total wipe out of a day it took me over an hour to get going when I finally woke at 13:30, I hate this being ill lark, Ive done nothing but sleep! so I ventured to Sainsburys for provisions again Ie more pain killers more lemsip and a bottle of brandy, I will kill this cold this weekend.
Got home to find the Caterham headlamps I won on ebay in a drunken bidding frenzy and paid far to much for are infact useless to me, ah well.
Back to work monday I feel bad about having been off for 3 days as it is, cant risk not getting better as im off on the big metal bird in 7 days.
Still no welding wire and my patience is wearing thin, I wanted the chassis at the powder coaters whilst Im away , thats definately not going to happen now.
Ah well at least if tomorrows nice me and the kids can just chillax
Got home to find the Caterham headlamps I won on ebay in a drunken bidding frenzy and paid far to much for are infact useless to me, ah well.
Back to work monday I feel bad about having been off for 3 days as it is, cant risk not getting better as im off on the big metal bird in 7 days.
Still no welding wire and my patience is wearing thin, I wanted the chassis at the powder coaters whilst Im away , thats definately not going to happen now.
Ah well at least if tomorrows nice me and the kids can just chillax
Thursday, 9 September 2010
Soft Kitty,Warm Kitty, Little Ball of Furr........


For those of you who don't get it watch the big bang theory.
So Ive not been to work for 2 days now with this cough its absolutely murder! every time i move sneeze cough etc all my chest muscles scream to be put out of their misery!
So what have I been doing, sleeping is what! lots of it.
I have gotten a few kit related things done, on a foray into St Neots (local big town) for some more cough medicine I dropped my prop into Baily morris to get it altered so that will be ready for collection Monday.
I also dropped my tank into an aluminum welding place on the same industrial estate to get that altered for a "drink" IE £10 later and as long as it took me to get to the chemist and back it was done and leak free!!!!
one last job accomplished was the purchase of a length of 10mm ID mild steel tube for making my new alternator bracket, not feeling adventurous I have done no "actual" work to the car but still feel that progress has been made.
I have the terrors ermm I mean kids this weekend so no chance for a rest up then or even much chance of getting work on the kit done, we might have a go at measuring up the brake pipes and sit in the warm like the cripple I feel.
Wednesday, 8 September 2010
I should have KNOW better............


So I'm writing this from bed at 15:15 in the afternoon, "Why aren't you at work!" I hear you cry! steady now and I will explain all.
The answer to the above question is "Stupidity" IE Mine.
Let me elaborate for you, Monday came and went as Mondays have a habit of doing, nothing special about it other than taking a mate to Birmingham to collect his new car, In the rain and yes looking over it and getting soaked, OK so not clever but not enough stupidity to really explain the title other than no work getting done on the kit.
Tuesday comes along pretending to be a nice friendly day, I am lulled into a false sense of security by a nice early start for work almost ensures a good finish! and yes I'm home and working on the kit by 17:10 a small miracle!
so the new gearbox mounts are tacked on the engine and box removed and split with the flywheel and clutch being removed and the engine fitted to the stand, nothing hard here and no hard work thanks to my super duper roof mounted winch.
chassis is pushed outside and the floors swept, then blown over with the air line to get all the remaining swarf out and stop it burying itself in my knees on a daily basis!
so i decide hmmm cars outside why not chuck it up on its side and clean the engine mounts up without getting a face full of grinding sparks and hey its not windy so finish the welds whilst its there!
Nah, grinding goes fine, but the welder really doesn't want to play and i end up removing the 0.7KG roll of wire and slinging it so I'm welderless at the moment waiting for the 5KG roll and 0.8 tips I ordered yesterday to be delivered.
still noting to explain my stupidity, well avid reader read on and laugh as you may.....
So with the chassis back on its wheels and ready to push back into the lock up I decided to get the degreasing gun out! with some Gunk in it (neat of course) I fill the lock up with atomised degreaser thinking as soon as I have done it i should have worn a breathing mask, yes people I am sitting hear rattling and coughing like an 90 year old cigar tester who also worked as a coal miner for fun. so learn from my mistakes use a breathing mask if your using a degreaser gun!
oh it didn't stop me tho I washed all the degreaser off and used the air line to blow it clean.
so laugh while you may I'm going to sit here sounding like Mutley from the Wacky racers! I just hope I can breathe well enough to go back to work tomorrow.
Enjoy the pics
Monday, 6 September 2010
Its too quiet something must be wrong........
Ok so I know it's been a few days without an update but I've had a few problems getting online.
so now for some news,
Radiator is fitted! Yay! and I've trimmed the nose cone down to fit i just need to take the sanding drum on the Dremel to the cut edge to smooth it off.

I've also trimmed the scuttle to fit too! And the front bulk head panel has been trimmed to suit the scuttle.
 Oh and Ive brought some new seats, I just need to collect them. oh and a set of Caterham headlamps, I know I've always planned to use Rush headlamps but they aren't IVA OK apparently so I will use these for IVA and then fit the Rush lamps when these *break*
So plan of attack for the next time I get some car time,
- Fit new brackets for gearbox
- Drill and fit Rivnuts for nosecone and scuttle and make load spreading washers for where the bolt passes through the GRP.
- Cut the head lamp brackets down to 120mm stalks and weld to chassis.
- construct alternator bracket and pipe up coolant system.
I think that's the way to head, oh enjoy the pics!
Subscribe to:
Posts (Atom)